Today I did some work on the mini-map. It's working great.

Later I'll be using some textures to make it look better, but for now it's just in the testing phase.
You can already see that it shows the location of friendly units and their viewing range.
Line of sight is currently dealt with as a radius only. I've thought of using obstacles to block sight but I think it's one of the things that was really unpopular with the original blitzkrieg. When an enemy was shooting at you but you couldn't see it to shoot back or even guess where it was. Very realistic, but also highly annoying.
I think there's going to have to be a compromise. If something is far beyond your line of sight, you can't see it (though it might see you). If something is blocked by a building, you might see it, but can't shoot it. You need to get a direct line of sight.
I'm also thinking of making out of range or blocked units invisible but represented by a question mark. You can still target them but your shots will be very inaccurate and you won't know what it is you're trying to hit.

I read some interesting info about WWII battles on a forum:
Most combat is about making the enemy withdraw, not killing them outright.In late 1941 effective range was thought to be around 750m for the 2 pounder and somewhat over 1000m for the short 50mm. However, shooting often started at ranges far in excess of that. On Totensonntag 1941, South African 5th Brigade opened up with 2 pounders, 25 pounders and small arms at 3000 yards and there is a question about them running out of ammunition before they were overrun.
From memory, I think Crisp (in Brazen Chariots) gives accounts of his Honey opening up at 1500 yards but he also indicates that they had little chance of hitting / doing any damage at that range, or much closer ranges for that matter. He also, from memory, attests to German 50mm guns effectively out ranging the 2 pounder by some distance.
...most firefights take place at ranges just outside the effective ranges of the weapons involved. It is only the very brave who place themselves within effective range.If you get very close to the enemy then you can kill their soldiers and destroy their tanks. But just by staying at range you can often make them withdraw or make them dig in. In the real life blitzkrieg attacks were often used to pin an enemy in place while other forces moved to cut them off or bypass them. Enemies cut off and encircled in this way quickly ran out of ammo and supplies and had to surrender.

Some other interesting statistics:
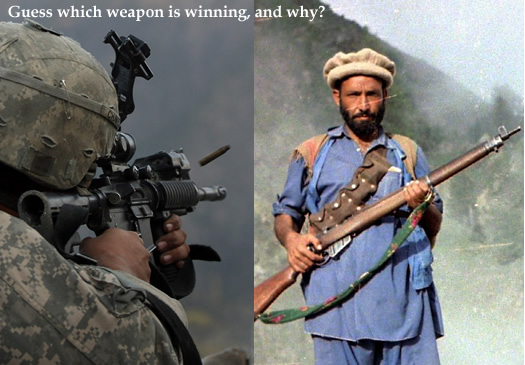
In WW1 for every combat casualty there were around 10,000 rounds fired.In Iraq and Afghanistan today that figure is in excess of 250,000 rounds for every enemy solder killed. This is partly because of the type of weapons used:
By WW2 this figure rose to about 25,000 rounds.
In Vietnam it was about 50,000 rounds.
A U.S. Army study found that the 5.56 mm bullets fired from M-4s don’t retain enough velocity at distances greater than 1,000 feet (300 meters) to kill an adversary. In hilly regions of Afghanistan, NATO and insurgent forces are often 2,000 to 2,500 feet (600-800 meters) apart.
Afghans have a tradition of long-range ambushes against foreign forces. During the 1832-1842 British-Afghan war, the British found that their Brown Bess muskets could not reach insurgent sharpshooters firing higher-caliber Jezzail flintlocks.
Soviet soldiers in the 1980s found that their AK-47 rifles could not match the World War II-era bolt-action Lee-Enfield and Mauser rifles used by mujahedeen rebels.
I'd like to make this a part of the game. At long range weapons will be pretty ineffective, and being in buildings or trenches will add further protection. But you will be able to suppress the enemy, reducing their rate of fire and pinning them in place or making them flee. Rifles will be better than submachine guns when doing this at long range.
If you really need to get in close and clear an enemy position you'll have to enter the killing zone, where your own troops will be vulnerable to enemy fire too.
The ability to decide when to suppress the enemy and when to engage will be quite important. On the one hand you want your experienced troops to survive, but on the other hand there will be times when you actually have to attack.
When that happens you'll want to have dedicated assault teams armed with grenades and sub machine guns and supported by well armored assault tanks.
If you'd like to help me out I've posted a poll about the best location for a UI in my game.
Comments
Post a Comment